Yes, you can publish an iOS app to the App Store without owning a Mac, and the reason is that publishing is two jobs rather than one. Something has to build and sign the app. Something else has to deliver that signed file to App Store Connect. Only the first job is genuinely macOS-shaped, and the macOS doing it does not have to be yours.
That split also decides whether you are on the right page. This one covers getting a build to Apple in the first place from a machine that is not a Mac. If an upload already ran and the build is not showing in App Store Connect, that is a different problem with a different diagnostic tree, and it belongs to its own article.
Every operating-system requirement, tool name and command form below was read from the vendor’s own documentation on 16 August 2026 and is named the way the vendor names it. No build was produced and no upload was run to write this article.
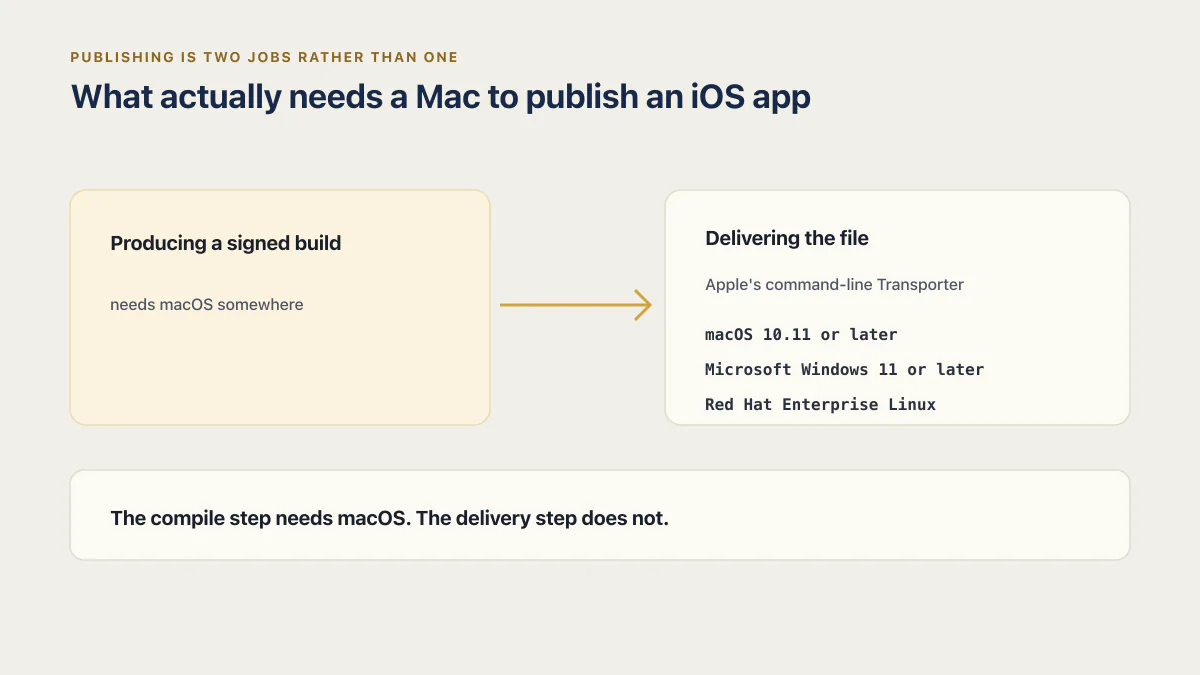
Publishing an iOS app without a Mac splits into two jobs: producing a signed build, which needs macOS somewhere, and delivering the file, which does not. Four routes arrange the first job for you, and Apple’s own command-line Transporter handles the second on Windows 11 and Red Hat Enterprise Linux.
What actually needs a Mac to publish an iOS app
The compile step needs macOS. The delivery step does not. Almost every guide collapses those two into one instruction, which is why a founder holding a finished file from a builder cannot find their own situation anywhere.
Start with the tool the whole genre assumes. Apple describes Xcode as the thing that “offers the tools you need to develop, test, and distribute apps for Apple platforms”, and the download button on that page points at the Mac App Store. Apple’s own App Store Connect help sends you to the same place, telling you to download Xcode on the Mac App Store. Nothing on either page prints a system-requirements line, so the hardware constraint is not something Apple states outright. It follows from where the software is sold.
Why every publishing tutorial starts with Xcode
Search for how to publish to the App Store from Xcode and every result opens the same way: install Xcode, archive, then use the Organizer window. That sequence is correct, and it is written for someone who already owns the machine it runs on, usually working in Swift, React Native or Flutter and standing at the start of a build. Searching for how to publish an Xcode app to the App Store gets you a procedure. Searching for how to publish an app you never opened Xcode to build gets you a shrug.
The honest floor underneath all of this: as of 16 August 2026, Apple’s App Store Connect help documents no way to produce a signed iOS build outside macOS, and the tools it names for that step are Mac software. That is a statement about what Apple has written down, not about what Apple forbids.
The constraint stops there. It binds the machine doing the compiling. It does not bind the person publishing, the account the app ships under, or the country you live in. Four different arrangements put a Mac in the compile step without putting one on your desk, and the rest of this page is those four plus the delivery step that never needed one.
What does not need a Mac at all is worth listing, because it is most of the work: enrolling in the Apple Developer Program, creating the App Store Connect record, writing the listing, uploading screenshots, answering the privacy questions, setting pricing and availability, and replying to App Review. All of that happens in a browser. Searches for how to deploy to the App Store without a Mac usually mean that whole bundle rather than the compile step, and the word deploy carries enough different meanings across web and mobile that it is worth settling on its own. Whether your product should be a native app rather than a web app is the decision that sits before all of it, and that decision has its own page too.
The four routes to publish without a Mac, ranked
| Route | What runs macOS for you | Who ends up holding your signing certificate | Cost band | When it is the wrong choice |
|---|---|---|---|---|
| 1. Cloud build service | The service’s own Mac fleet | The service, unless you upload your own | Metered, with a free allowance on most | Your stack is not one the service supports |
| 2. CI with a hosted macOS runner | A rented macOS runner inside your pipeline | You, in your own secret store | Metered by build minute | Nobody on your side can keep a pipeline alive |
| 3. Mac in the cloud | A whole or managed Mac you rent | You, on a machine you do not own | AWS has a 24-hour host minimum; managed providers can sell hourly access | You need tools or permissions the selected plan does not provide |
| 4. Borrow a Mac | Someone else’s laptop | Whoever’s laptop it was | Free to start, and the most expensive when it goes wrong | Anything you plan to repeat |
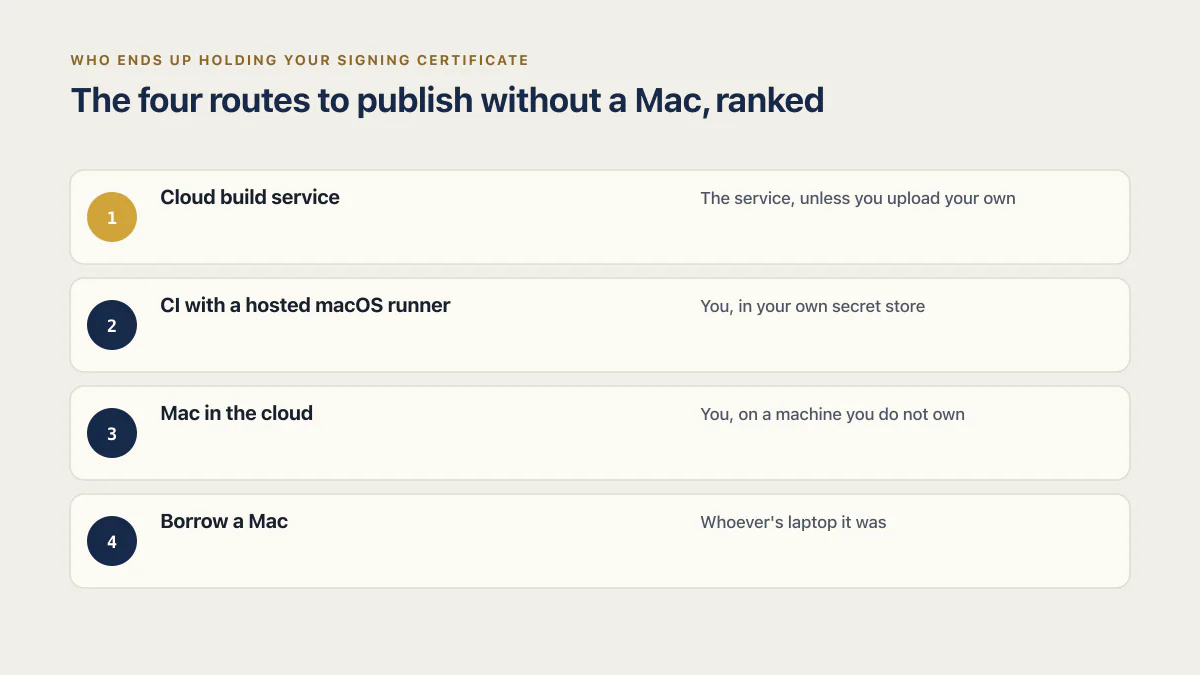
That ordering is by how well each route holds up when you ship again, which is why the free borrowed laptop sits last; a first-time publisher usually shops the other way round, by what costs least to start. It is not the order they rank in six months later. The dated figures below show provider constraints, not the full first-year cost of each route. What each route actually costs, in real money and over a first year, is priced on its own page. Check current terms before choosing.
The column most people skip is the third one. Your iOS distribution certificate is the credential that says builds signed with it are yours, and each route parks it somewhere different. A service that generates it for you is doing you a favour on day one and holding something of yours on day two hundred. A certificate on a friend’s laptop is a certificate you will be texting someone about the next time you ship. Route 1 and route 4 are still reasonable choices; the cheapest route is simply one to choose on purpose rather than by default.
How to upload an .ipa to App Store Connect from Windows or Linux
Apple’s command-line Transporter uploads an .ipa to App Store Connect from Windows and Linux as well as macOS. Apple’s own Transporter User Guide 4.2 lists macOS 10.11 or later, Microsoft Windows 11 or later and Red Hat Enterprise Linux as supported operating systems. It delivers the file, and it does not build or sign it.
This is the section for the reader who already has an .ipa and needs to upload it from Windows or Linux. What a Base44 store build actually contains, and the whole Base44 path from export to store files, are both covered elsewhere. This page picks up at the point where the file exists and the machine in front of you is not a Mac.
Now the contradiction that keeps this answer buried. Apple’s App Store Connect help says: “Transporter is a macOS app that provides a simple and easy way to upload an app to App Store Connect for distribution.” The same page tells you to download the latest version on the Mac App Store. Read that alone and the question is closed.
Apple’s Transporter User Guide 4.2, read on 16 August 2026, says something else. Under its system and network requirements it prints the line “Apple supports Transporter on the following operating systems:” and then three items:
- macOS 10.11 or later (64-bit system)
- Microsoft Windows 11 or later (64-bit system)
- Red Hat Enterprise Linux (64-bit system)
Both are true, because they describe two distributions of the same product. The Mac App Store carries the desktop application. Apple’s own upload page names the second distribution in passing: for anyone using the App Store Connect API, it points at “the Transporter command-line tool and JSON Web Tokens (JWTs) for authentication”. The guide covers that command-line tool, and it has Windows and Linux builds with install instructions for each. It is its own download rather than something bundled inside Xcode, which is what makes uploading an .ipa without Xcode possible at all. Across the two Google searches checked for this page on 16 August 2026, sixteen organic results in total, not one mentioned the command-line tool or its Windows and Linux builds.
The guide is specific about what the tool moves. Its requirement for app developers is to “Deliver IPA files (.ipa) for iOS, tvOS, and visionOS apps or deliver PKG package files (.pkg) for macOS apps.” The first of those is the file a cloud builder hands you.
The order of operations:
- Create the app record in App Store Connect first. Apple’s upload page is explicit that uploading a build comes after the app has been added to your account, and the record is what the build attaches to.
- Download and install the command-line Transporter for your operating system. The guide carries a separate install section for macOS, Windows and Linux.
- Decide how it will authenticate. The guide documents three ways: an Apple ID with an app-specific password, an App Store Connect API key with its issuer ID, or a JSON Web Token.
- Point it at the file with the
-assetFileoption. The guide is blunt about the alternative: “The -f option cannot be used to upload or verify an app. For apps, use the -assetFile option instead.” In the guide’s list of what upload mode requires, that option is printed as-assetFile <.ipa | .pkg>for macOS, Linux and Windows uploads. - If your account is attached to more than one App Store Connect provider, the guide requires you to say which provider the upload belongs to.
Two limits, before anyone gets too pleased. Transporter delivers a file and it does nothing else: it will not compile your project and it will not sign anything. And if what your builder handed you is not a signed distribution build, this route is closed to you no matter which operating system you are on, because the file itself is the problem. That is the case where you go back up to the four routes.
Once the upload succeeds, the build has to process before it appears against your version record. If the upload ran and the build still is not there, stop working on the upload: that is a separate failure with its own tree, and it has its own article.
The four routes to publish without a Mac, one at a time
Route 1: a cloud build service builds and submits for you
The service keeps its own Mac fleet, compiles there, and hands the result to Apple. Expo’s EAS is the clearest documented example because its own pages state both halves out loud. Its EAS Build introduction, dated 22 July 2026, says iOS builds run on macOS machines hosted in Expo’s own cloud. Its iOS submission guide, carrying the same date, says: “EAS Submit works on macOS, Linux, and Windows, so you don’t need a Mac to ship iOS builds.”
That arrangement moves the macOS machine onto somebody else’s invoice, which is the trade every service in this category asks you to make.
The submit command is one line, and Expo’s documentation describes what it does: it selects a build, will “prompt for your Apple ID on first run”, and uploads the binary to App Store Connect. Its prerequisites are a paid Apple Developer account, a bundle identifier in your app configuration, the EAS CLI installed and signed in, and a production .ipa from EAS Build. The full build-and-submit sequence for a React Native project is a longer walkthrough than this page should attempt, and it belongs in its own article; what to check before a Rork app goes to production covers the same Expo machinery from the readiness side.
On certificates, Expo states the arrangement plainly: “EAS Build can generate and manage Android keystores, iOS provisioning profiles and distribution certificates, or use credentials you provide.” Read that as the choice it is. The default is convenient and it puts the credential in their custody. Bringing your own is more setup and keeps it in yours.
Other builders answer the Mac question inside their own product rather than sending you to a service. Replit’s documentation answers it directly for Replit users, and Base44’s documented submission flow names no Mac, Xcode or Transporter at any step as of 16 August 2026, a claim those pages own and keep current. What Replit’s own documentation says about the Mac question is worth reading before you assume you need any of this. codemagic.io, bitrise.io and appcircle.io sit in the same category as EAS and are named here without links, because a stuck founder clicking straight to a vendor checkout is not the next step this page wants to create.
Route 2: sign and upload from a hosted macOS runner
Your continuous integration provider rents you a macOS machine for the length of a build. GitHub’s documentation is direct about the hardware: “GitHub hosts macOS runners in Azure data centers.” A workflow on one of those runners can archive, sign and upload without anyone touching a laptop.
This route has the best answer in the custody column and the worst answer everywhere else. The certificate and the App Store Connect key live in your own secret store, under your own account, and they stay there when a vendor relationship ends. The price is that somebody has to keep the pipeline working: certificates expire, runner images change, and a broken workflow surfaces on the day you are trying to ship a fix. If there is nobody on your side who will notice a red build, pick route 1 and accept the trade.
Route 3: rent a Mac in the cloud and publish from it
You rent a Mac and treat it like a desktop you happen to reach over the internet. The commercial model depends on the provider. As of 17 August 2026, AWS documents EC2 Mac as a bare-metal instance on a Dedicated Host with a 24-hour minimum allocation before the host can be released. That minimum applies to AWS’s Dedicated Host product.
Managed access can be shorter. As of 17 August 2026, MacinCloud’s checkout advertises pay-as-you-go access from US$1 per hour or US$4 per day. Its hourly plan has no administrator or root access, so confirm that the included Xcode, Transporter, and permissions fit the job before paying. These are dated commercial terms and can change. The custody answer is halfway: the certificate is yours, sitting on a machine that is not.
Route 4: borrow a Mac to publish, never the account
The route everyone tries first, usually a friend, a colleague, or a coworking desk. Two rules carry the whole section.
Borrow the machine and not the account. Publishing under someone else’s Apple Developer Program membership makes the app theirs in Apple’s records, and untangling that later is a support conversation nobody enjoys. Who should hold the Apple Developer account, and what happens when the wrong person does, is a question with real consequences for a non-technical founder, and it deserves its own page rather than a clause in this one.
Then get the credentials off that machine. Whatever gets created during the session, the signing certificate and its private key, the App Store Connect API key, the Apple ID it was all done under, has to end up somewhere you control before you close the laptop. The failure here is quiet: everything works, the app ships, and eight months later a certificate expires on a computer you no longer have access to.
What no route fixes about publishing to the App Store
None of the four gives you an Apple Developer Program membership, an App Store Connect record, screenshots at Apple’s required sizes, an answer to the privacy questions, or a reviewer’s approval. The Mac was one assumption inside the job, and removing it leaves the rest exactly where it was.
The neighbours worth knowing about, once the hardware question is settled. The whole publishing sequence, from the account onward, is a longer walkthrough that covers the parts a browser handles. Capturing store screenshots without a Mac or a simulator is its own small problem with its own answers. What a reviewer opens when the app is a shell around a website decides whether any of this was worth doing, and that is a guideline question rather than a hardware one. And getting a signed build to testers without a Mac first is the shorter version of this page, ending at a beta build in a tester’s hands rather than a public listing.
One thing this page cannot tell you is which route you will still be on in a year. Most people start on route 1 because it is fastest, and the ones who move do it after something small goes wrong with a credential they did not know they had given away.
Common questions about publishing an iOS app without a Mac
Do I need a Mac to publish an iOS app?
No. You need macOS to compile and sign an iOS build, and you can rent, borrow or subscribe to that rather than own it. The account work, the App Store Connect record, the listing, the screenshots and the review replies all happen in a browser on any machine. Four routes cover the compile step, and Apple’s command-line Transporter covers the upload step on Windows and Linux.
Can I upload an .ipa to App Store Connect from Windows?
Yes, with Apple’s own command-line Transporter. The Transporter User Guide 4.2 lists Microsoft Windows 11 or later as a supported operating system, alongside macOS and Red Hat Enterprise Linux, and the guide’s scope covers delivering .ipa files for iOS, tvOS and visionOS apps. Apple’s App Store Connect help calls Transporter a macOS app and points at the Mac App Store, which is why the Windows build is easy to miss.
Do I need Xcode to publish to the App Store?
No, though the file Xcode produces is still what Apple receives. Apple names several tools that can upload a build, and Transporter is one of them. A cloud build service or a macOS runner in your pipeline produces the signed build Xcode would otherwise produce, and the upload runs from there or from Transporter on your own machine.
Can I publish to the App Store from Linux?
For the upload step, yes. Apple’s Transporter User Guide 4.2 names Red Hat Enterprise Linux (64-bit system) as a supported operating system for the command-line tool. The build step still needs macOS somewhere, so a Linux desktop plus a cloud build service or a hosted macOS runner is a complete arrangement, and a Linux desktop alone is not.
Can I use someone else’s Mac to publish my app?
Yes, and borrow the machine rather than the account. An app published under another person’s Apple Developer Program membership is registered to them, and moving it later is a support process rather than a setting. Before you finish the session, copy the signing certificate and its private key, plus any App Store Connect API key created, somewhere you control permanently.
My builder gave me a file. Is that enough to publish?
Only if it is a signed distribution build. Transporter delivers a file to App Store Connect and performs no compilation and no signing, so an unsigned or development-signed artifact fails at the upload regardless of the machine you run it from. If the file will not go through, the fix is upstream in whatever produced it, which usually means one of the four build routes rather than a different uploader.
Does publishing to Google Play have the same problem?
No. Google Play’s publishing requirements name no desktop operating system, so the hardware question never arises on that side of a two-store launch. Publishing an AI-built app to Google Play has its own steps and its own pitfalls, mostly around signing keys and testing tracks rather than what computer you own.
The upload worked and my build is not in App Store Connect. What now?
Stop troubleshooting the upload. A build that Apple accepted and that is not showing against your version record is a processing, compliance or identity problem rather than a transfer one, and the checks for it run in a specific order. If the upload ran and the build still is not there, that diagnostic sequence is a separate article and it starts from the failure state rather than from the tooling.
If you have a working app built with these tools and need it ready for real customers, this is what we do.
Built it with AI. Now it has to hold up for real customers.
The Production Hardening Sprint takes the app you already have and builds the production foundation underneath it. Authentication and access rules, payments that stay consistent, error handling, monitoring, backups, automated tests and a documented handover. Our engineers work inside your existing codebase for ten working days. All 123 deliverables are included, and you get the evidence for each one.
See the Production Hardening Sprint →  $2,500 fixed price · 10 working days · One codebase